
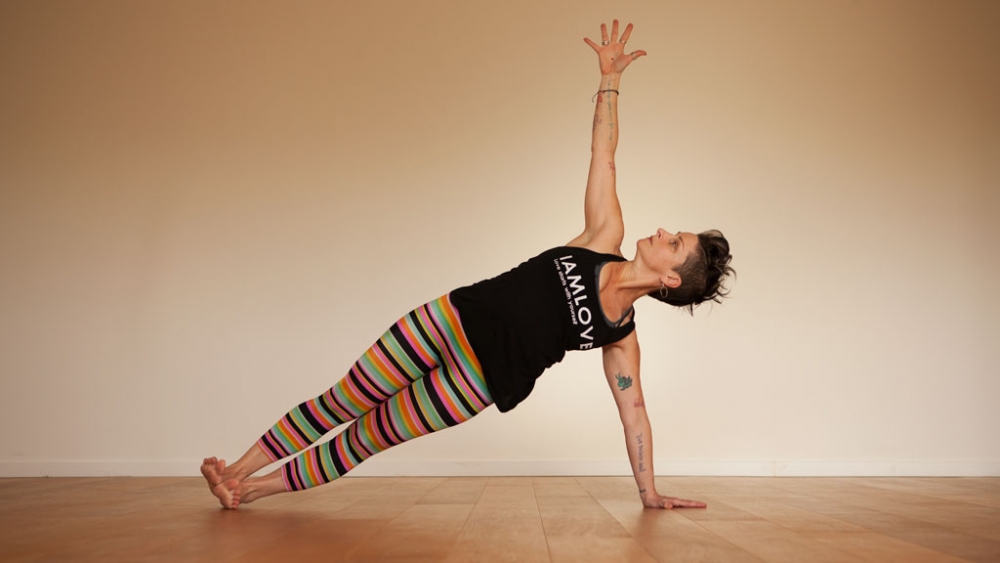
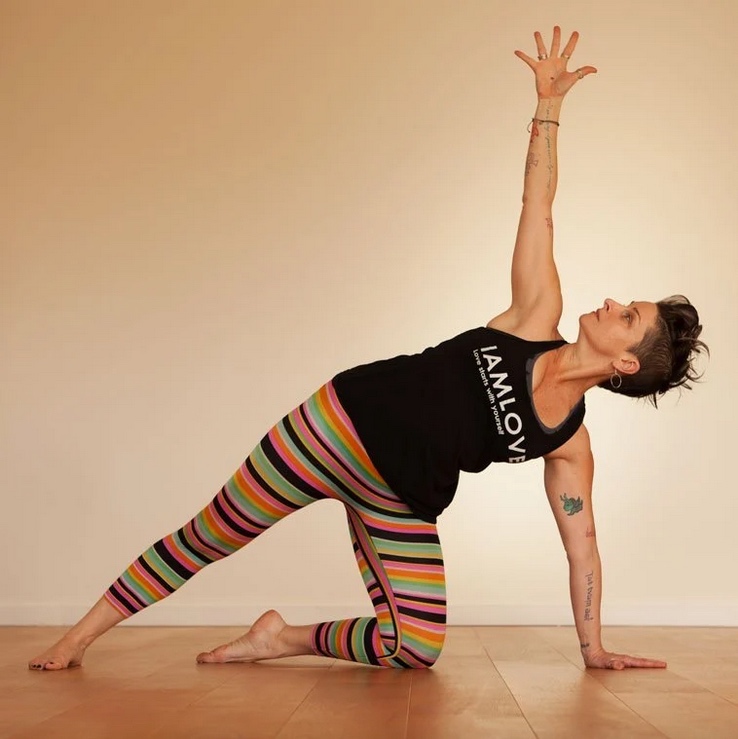
Recently, I took a class where my friend taught us a brilliant sequence. It incorporated layers and layers of Side Plank (Vasisthasana) variations. It wasn’t just the myriad ways this pose could be practiced that I enjoyed but the infinite transition possibilities.
We spiraled, undulated and spilled our way from Downward Facing Dog, Lunge, Plank, and even from standing poses. Such a beautiful, intricate and challenging dance. I left my friend’s class feeling happy and light, spacious, strong and free!
Ten-step process for a safe Side Plank
Since this class, I have been adding more Side Plank variations into my class sequences. Very quickly I remembered why I had allowed Side Planks to fade away from my asana teaching repertoire. Side Plank is hard!
Side Plank needs to be practiced with a strong, stable and integrated foundation. Otherwise, it may also cause wear and tear to the connective tissues in the shoulder, elbow and wrist joints. Here is my ten-step process for a safe Side Plank!
1. Shoulder and wrist warm-ups
Side Plank requires much-needed shoulder, elbow and wrist strength, stability and integration to be practiced safely.
Begin your practice with warming up these joints (and the muscles that cross these joints). These could include:
- Arm-of-the-Clock in Reclining Twist
- Dynamically moving in and out of Threading-the-Needle in Tabletop position
- Moving in and out of Eagle and/or Gomukhasana arms in seated postures are all good options.
Wrists rotations and stretches can also be done lying down, on all fours or seated.
2. Warm-up and wake up the core
Think of your core as an apple core (your axis from crown to tail). First, warm up and wake up the muscles that will support your spine in the lateral-parallel position of Side Plank.
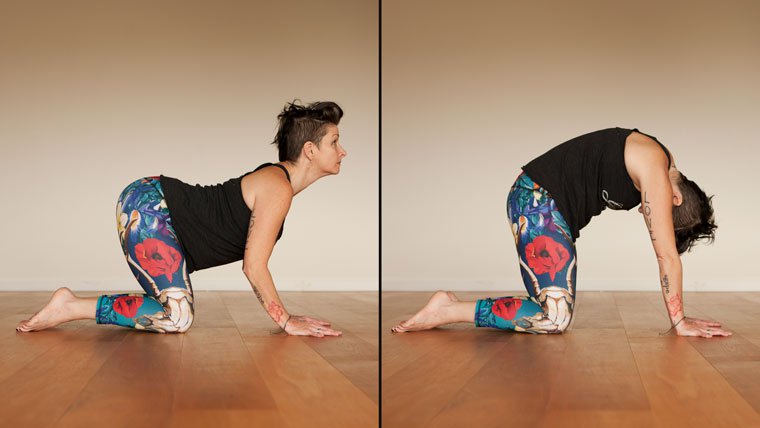
Dynamically moving in and out of Cat/Cow will wake-up the extensors of your back and your abdominal muscles.
This is important to ensure stability in the pose. Your back extensors will prevent you from tipping forward, your rectus abdominis will prevent you from tipping back. Your obliques support the ribs and prevent them from collapsing in the pose.
3. Wake-up the deep core
Another helper in keeping the side body from dipping and sagging in Side Plank is the deep frontal myofascial meridian. This runs from the bottoms of the feet, up the heel and arches, inner and back of the calves. It travels up the inner and back of the knees and thighs and into the pelvic floor. There it blossoms out like a flower to support the inner pelvis) and the inner organs.
Without the support of the deep core fascia, it’s easy to collapse into the lower leg, hip, shoulder, elbow and wrist in Side Plank.
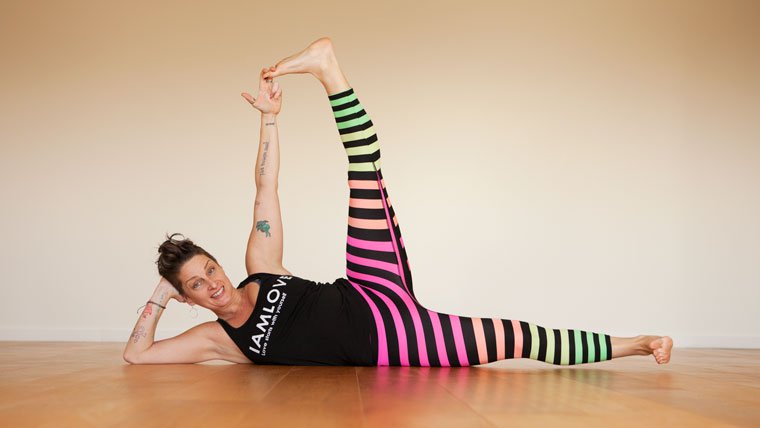
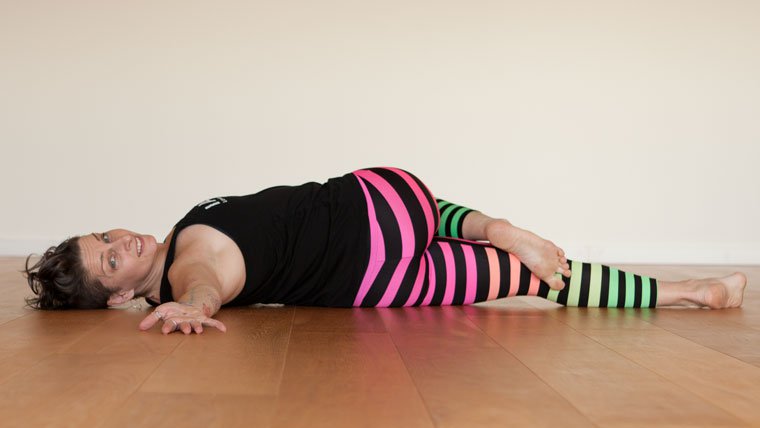
My favorite way to bring awareness into this deep core connective tissue is through a variation of Vishnu’s Couch (above).
Lie on your side with your hand or arm as a pillow. Then, bend your top knee and reach past the inner thigh for your big toe. Do a few dynamic movements to warm up the quadriceps, hamstrings and calf muscles. This will also warm your legs, inner thighs and groin for later Side Plank variations!
After warming up, extend your leg as straight as possible (for you), roughly perpendicular to the ground. Wrap a strap around the foot and hold it with top hand if needed.
Once your legs are in a general L-shape position, flex both your ankles and spread your toes. Begin to lift your lower leg off the floor. Move it slowly up to the top leg without tipping backward, if possible.
This variation will help to wake-up the inner leg lines from arches of feet up into your pelvic floor. The deepest layer of the abdominals (transverse abdominis) is also awakened and strengthened in this exercise.
4. Shoulder integration
Ligaments are not elastic and therefore, once stretched, will not return to their original state. Therefore, we cannot – especially in higher center of gravity, weight/load bearing postures – ‘hang out’ in our ligaments.
‘Hanging out’ in Side Plank is easy to do. It’s important to integrate the humerus bone into the spacious, shallow joint created by the clavicle and the scapula.
To integrate the shoulder joint properly we need to use our
- infraspinatus, externally rotating the head of the humerus into the “ball” of the clavicular-scapula joint,
- serratus anterior, spreading (adducting/protracting) the shoulder blade to the outer ribs,
- latissimus dorsi, trying to draw (adduct) arm towards the side body creating armpit hollows and;
- lower trapezius to keep shoulders away from the ears.
Once all these steps are initiated and practiced, a strong and stable foundation is formed to support many different variations of Vasisthasana.
Learn more in class: Shoulder integration in Side Plank
- “Adduction? Protraction?” Check out A beginner’s guide to anatomy terms
5. Hasta Bandha
“Little puffs of air in the middle of the palm” is sometimes how I describe Hasta Bandha described.
Bandhas are internal “locks” that once energy is drawn up into the body enable the energy to be “locked” in. The three most common bandhas are Mula Bandha (root lock located in the pelvic floor area of body), Uddiyana Bandha (upward fly lock in the navel/diaphragm area of the body) and Jalandhara Bandha found in the throat area (throat lock).
Lesser-known Bandhas exist; the two we hear about the most on the yoga mat are Hasta and Pada Bandhas (hand and foot locks). The purpose of drawing energy upwards into the body has many physiological, psychological and energetic benefits.
For a safe and stable Side Plank, engaging Hasta Bandha strengthens the muscles of the hands, wrists and forearms. It also encourages lightness (remember…gravity is ALWAYS a factor) on the bones of the hands, wrists, elbows and shoulders.
6. Offer knee down option first!
Sometimes yoga teachers will give all the alignment cues for Side Plank pose. Then, almost as an afterthought, say, “If you need to, lower your knee to the ground.”
However, it’s more helpful to offer the knee down variation first. Students always feel more empowered when they can practice the lower center of gravity (easier) version first. They can then move (step-by-step) towards the higher center of gravity (harder) variation.
There’s a second important reason to offer easy-to-hard options, especially in Side Plank. Lowering the knee from Side Plank will land it at an odd angle, instead of directly under the hip socket.
Furthermore, the student that needs to lower their knee is probably already doing something beyond their physical capability. In turn, this may result in them over-exerting themselves to the point where they “drop” their knee to the mat. (For safety…there should be no “dropping” of body parts).
7. Shift back before you stack and roll
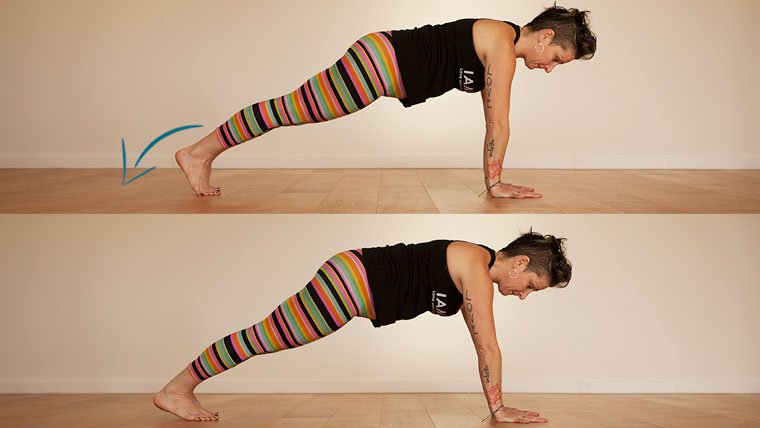
Though the shoulders should be stacked over wrists in Plank, we cannot roll into Side Plank and keep this alignment.
For most of us, when transitioning to Side Plank, our shoulder shifts forward of Plank bone-stacking alignment. This leaves us very little room to perform the necessary shoulder integration we talked about above.
Shifting slightly backward toward our heels in Plank means we can more easily initiate the Side Plank transition. From the hand pressing down, the Hasta Bandha lifting up… From the external rotation of the humerus bone and the abduction of the serratus anterior…The depression of the scapula with lower trapezius and the adduction of the latissimus ..
Once we perform all those actions we’ll be right back in our perfect bone-stacking alignment we were in during Plank!
8. Knife-edge or flat foot?
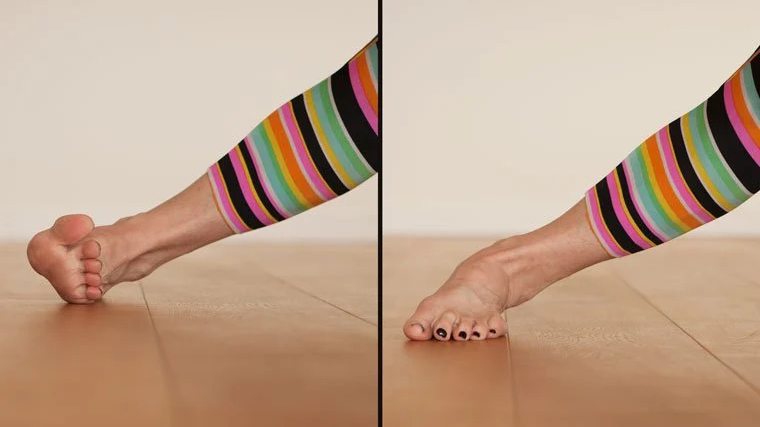
When we turn to enter into Side Plank there are a few options for the feet.
Stack, stagger, lower the bottom knee so only one foot is in Side Plank variation. Step top foot in front of hip area or step the foot behind (an extended Side Plank variation of “Wild Thing”).
The bottom foot in Side Plank variations can be positioned in ankle flexion – see above left. Or in ankle eversion with the four corners of the bottom foot on the mat (above right). This variation supports fuller expressions of Side Plank (lifted leg) as we have a wider surface area as a foundation.
9. Look down before spiraling down
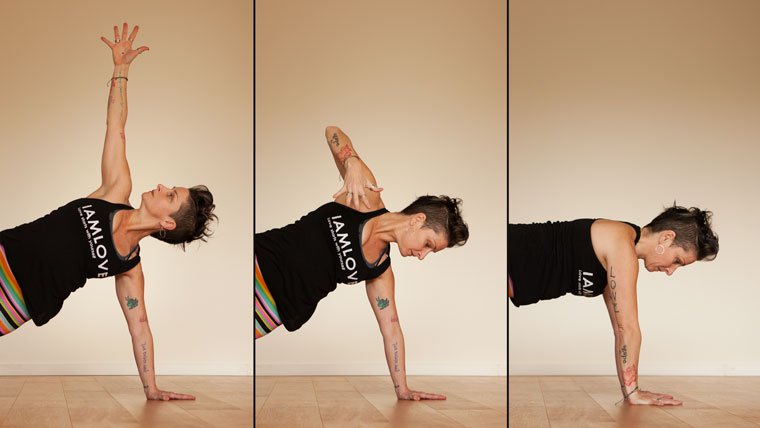
There is well known Drishti saying in yoga: “Where the eyes go the body will follow.”
In Side Plank it behooves us to look up as the energy of the pose will be more uplifting. A final inhalation in the pose is also wonderful with the accompanying cue of, “reach up and look up!”.
We exhale to support a safe and deliberate descent. As we look down, the top shoulder girdle and extremity of the arm will naturally follow the downward gaze.
The obliques will naturally initiate the downward rotation of the torso and hips. Thus, allowing for a safe and supported return to Plank.
10. Counterposes for Side Plank
To safely practice Side Plank, a lot of shoulder integration is necessary. It’s always important to stretch that which was strengthened in order to aid the body’s quest for harmony and balance.
Useful counterposes include Gomukhasana arms (especially the lower arm), Purvottonasana (Upward Plank), and Setu Bandha Sarvangasana (Bridge pose).