
In this article I will look at some foot and knee anatomy and give some alignment tips and key principles for practising standing and seated yoga poses safely.
In all yoga poses your first focus is on your foundation – start with what’s on the ground.
In standing poses your first focus is on the feet, then you focus on the joint above, the knees. Your feet and knees are closely connected and should be considered together when it comes to maintaining safe alignment in poses.
Anatomy of the feet
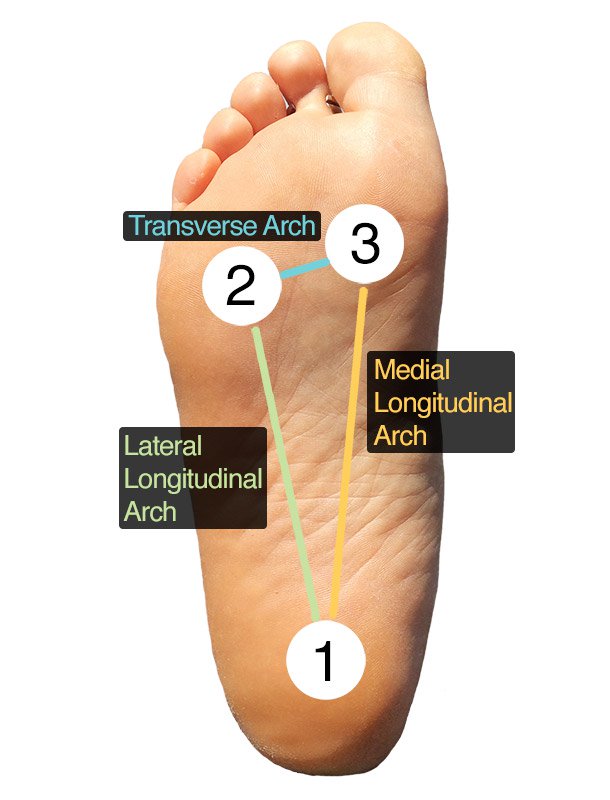
The 3 arches of the foot:
The foot has three arches, these arches are crucial in giving the feet flexibility, absorbing shock, adapting to the different surfaces they encounter and distributing the weight of the body. These arches are also important to know about in your yoga practice because they influence the foundation and alignment of the rest of the pose.
- Medial longitudinal arch: this arch runs along the length of the instep, from the big toe side of the foot to the heel. This arch doesn’t touch the ground and is most involved in weight-bearing activities.
- Lateral longitudinal arch: this runs along the length of the pinky side of the foot. Its mostly involved in propulsion and it does touch the floor.
- The transverse arch: this runs round from the lateral to the medial side of the foot (outside to the inside of the foot). Just behind the ball of the foot.
In standing poses we must try and keep the arches engaged. When you keep the arches engaged (and refrain from collapsing them) this strengthens the arches and creates a solid foundation for the rest of the pose.
Weight-bearing
3 (or 4!) points of the foot:
The key to maintaining the arches is to distribute the weight on the 3 points of the foot: First, the centre of the heel, second on the ball of the foot on the little toe and last, the ball of the foot on the big toe side. Also in that exact order, you place the 3 points down.
This is the way I was taught and the anatomy of the foot seems to support this. However, I would like to note that a lot of yoga teachers are taught to distribute the weight of the body over 4 points of the feet – inside and outside of the heel and ball of the little and big toe… You will have to make your own choice as to what works for you. In this article I will focus on the 3 points.
To learn more about the 3 corners of the feet watch Amy Matthews’ short talk from embodiedanatomy.net
Distribution of weight
In your standing poses, a general rule for most poses is that half of the weight should fall on the heel and the other half is divided over the ball of the big and little toe.
Making sure your feet are flexible and strong will make sure they can fulfill their important role providing a solid, well-aligned foundation for the rest of the body.
Making sure your feet are flexible and strong in all ranges of motion through different poses will make sure they can fulfill their important role of providing a solid, well-aligned foundation for the rest of the body in the pose.
Stiff or sore feet?
Try Sandra’s Yoga Therapy class – Happy Feet Practice (members only)
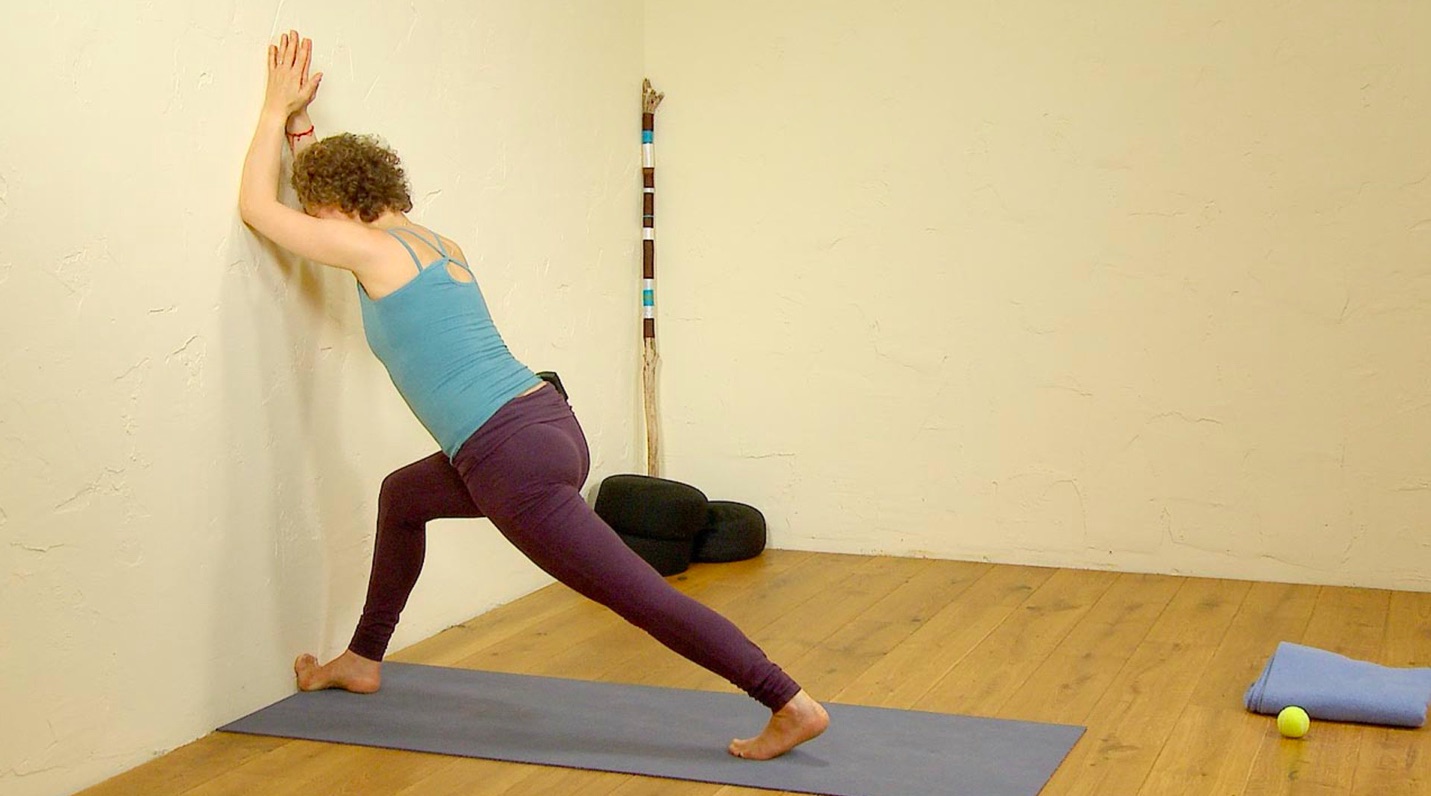
Remember the back leg!
It’s so easy to collapse for example in Warrior I, in the medial longitudinal arch. But if you do, you twist the knee. So pay attention to turning the back foot in enough, so that you can keep grounding the 3 points down and the weight stays divided over the ball and the heel of the foot. This way your arch stays lifted, your knee stays safe and your pose comes alive!
That brings us to the knees…
Important knee alignment principles
Standing poses
1. Keep the knee and foot in line
To keep your knees safe you want them to be in the right alignment with the feet. They should both point the same way. Handy to know is that the foot shows the rotation of the shin and lower leg. The knee shows the rotation of the femur (upper leg bone) in the hip joint.
For example, in Trikonasana (Triangle pose) the front kneecap should point over the centre of the foot. This requires a strong outward rotation of the femur bone in the hip socket, to align the femur with the shin and foot. If the outward rotation isn’t happening, the knee will point inward and there will be a twist happening in the knee joint. Which is where the femur and lower leg bone come together.
2. Don’t allow the knee to twist
Basically what you want to remember is that we don’t want our knee joint to do any twisting and side bending generally speaking. The knees are not so suitable for that. So as long as the knee and the centre of the foot are pointing in the same direction, and there is a clear path of weight down through the feet balanced over the 3 points, you are keeping your joints healthy.
So in a bent leg yoga position like Warrior II or Extended side angle pose, it is generally best to keep the knee pointing over the centre of the foot, and to avoid the natural tendency of the knee pointing inward of the foot. As yoga teachers we often say something like: “Turn the knee towards the little toe side of the foot.” As a result, your femur will rotate outward to make that happen and your knee ends up in the right place with regards to the foot.
If the knee is pointing inward with regards to the foot, you are not only twisting the knee joint but you are also side bending it a bit. Both of the things we preferably don’t want to happen…
3. Engage your Quadriceps
You know your quadriceps (muscles along the front of the thighs) are active and engaged when you cannot move your knee cap around. Try this exercise: sit with your legs extended out in front of you, relax our legs and hold the kneecaps on both sides. As long as you keep the leg muscles relaxed, you can move your kneecaps around. The moment you engage your upper leg muscles (quadriceps) you cannot move the kneecap anymore and it’s stable.
This tells you that the strength in the quadriceps is very important in supporting the knee joint, including the kneecap, which is in fact embedded in the quadriceps tendon. An engaged and strong quadricep helps to stabilise the femur and shin bone and bring them in proper alignment with regards to each other. So please make sure you engage your quadriceps in your standing poses, and even most seated poses, to keep the knee joints healthy and protected.
Strength in the quadriceps is very important in supporting the knee joint, including the kneecap, which is in fact embedded in the quadriceps tendon.
The inner quadricep is especially helpful in supporting a fully extended straight knee. Please note that a straight knee is different to an over-extended knee – another thing to avoid. If your tendency is to overextend, try and keep the knee a tiny bit bent and really engage the quadriceps to stabilise that action.
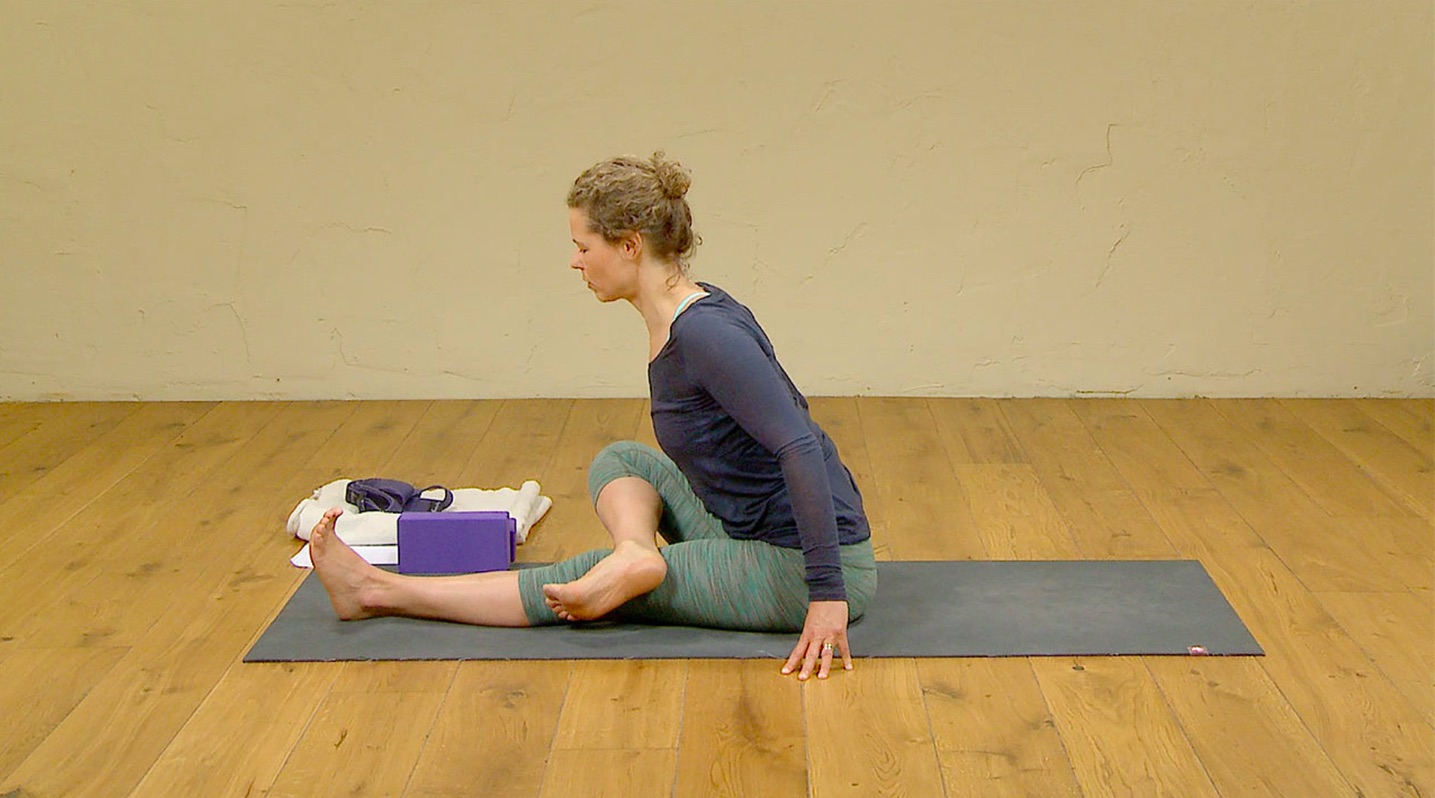
Seated poses
1. Shin and femur aligned
In seated poses it is also important to keep the alignment of the shin bone and femur bone straight. So for example in Virasana, sitting on your knees with your toes pointing out (instead of back) creates again a twist in the knees that isn’t very healthy and destabilising for most people.
2. Open hips – reduces stress on the knees
The moment you come into hip opening poses, like Lotus pose (Padmasana) or Eka Pada Raja Kapotasana (Pigeon pose), something else is happening as well. We need the hips to be open (for those poses, again a strong outward rotated femur bone is needed in the hip socket). This opening really needs to come from the hip joint. If not it is going to be compensated by the knee joint and once again we end up twisting and side bending the knee joint as a result.
Remember that with hip opening poses you should not feel the work in your knees. If you do – come out of the pose and go less deep, or find an alternative position.
When your hips are stiff, the knees will try and compensate as a result. If you are not aware of this mechanism of the knee joint compensating you will put your knees at unnecessary risk and they will suffer.
Do you suffer from knee injuries?
Sandra Carson’s “Heal your knees” class is for people that have a knee injury or for people that are at risk of hurting their knees due to misalignment in the legs. Simple, effective poses and exercises will teach you the actions that will be able to bring your knees right back on track.
Remember these simple principles to stay safe:
This may all sound a bit alarming, but you only have to keep a few things in mind:
- Check the alignment of the knee with regards to the centre of the foot, and the femur bone with regards to the shin bone. Remember no twisting or side bending in the knee joints.
- If you do end up feeling strain in the knees, back out of the pose and experiment to see if you can change the pose to that degree that you feel the stretch in your hips or groin instead.
- Keep engaging and strengthening your quadriceps to stabilise the knee joint.
- Avoid overextending your knee joint.
- Practise with awareness and care, and mind your alignment
Love,
Esther